In this tutorial, I will explain how to install and use OpenCV in Andriod Studio to create a mobile app that will make the camera on your phone to display in grayscale. This tutorial will assume that you already have Android Studio installed.
Step 1: Download OpenCV
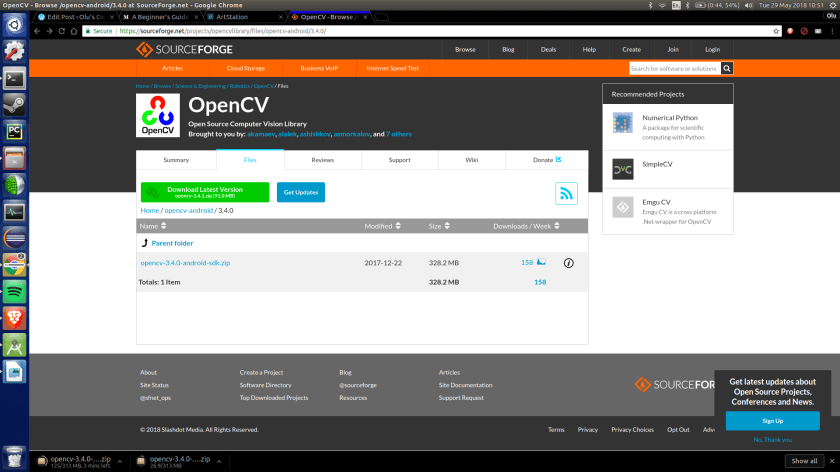
First, you must download the OpenCV SDK for Android that you can find here and then extract it. For this tutorial, we will be using version 3.4.0.
Step 2: Import OpenCV into your android project
- Create a new empty Android project and give it a name of your choice. Keep the default options.
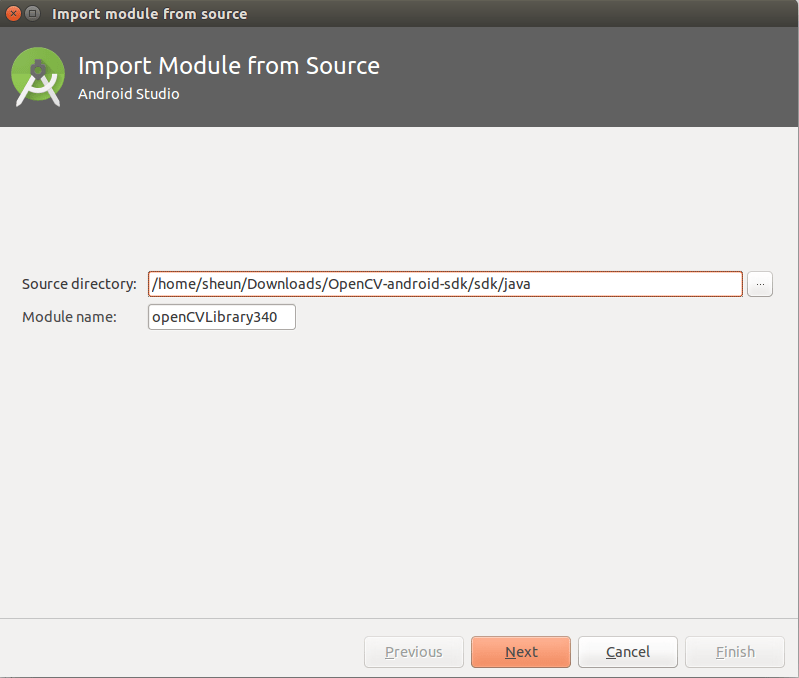
- Go to ‘File->New->Import Module’ and enter the path where you saved the OpenCV package we just downloaded and then go into the “sdk/Java” folder path and then select next.
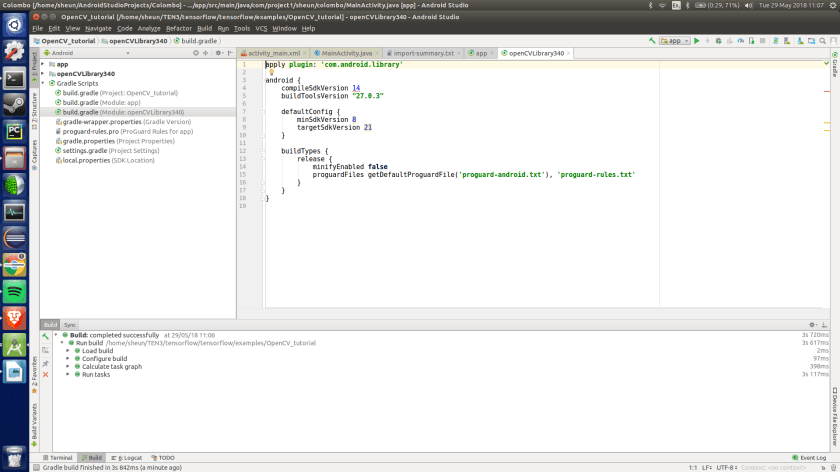
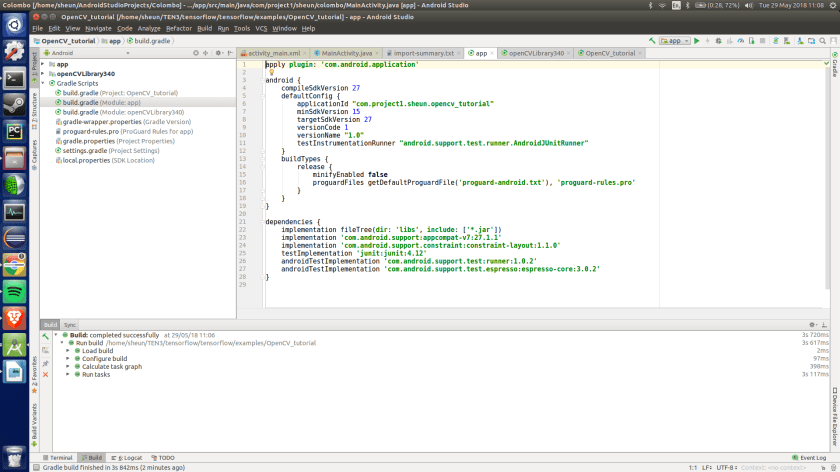
 3. Now, in your project structure view on your left-hand side of the screen, you should be able to find your Gradle scripts for both “app” and “OpenCvLibrary340”. Within both those scripts you should be able to find the following names with a number assigned to each of them:
- copilesdkVersion
- buildToolsVersion
- minSdkVersion
- targetSdkVersion
Make sure that for both scripts the numbers assigned to the above names are the same.
 Next, you must add OpenCV as a dependency. In your project manager right click on your “app” module and select “Open Module Settings”. Select the dependency tab and select the “+” button. You should then see the OpenCV module, select that and click Ok.

3rd Step: Add permission to the manifest file.
- Add the following line to your manifest file so that your app can request for permission to use the camera (When you have downloaded your app on your phone make sure that you go the app’s settings and give it permission to use your camera);
-
<uses-permission android:name="android.permission.CAMERA" />
-
- replace the contents in your activity_main_layout.xml file in your ‘res/layout’ project directory with the following:
-
<RelativeLayout xmlns:android="http://schemas.android.com/apk/res/android"
         xmlns:tools="http://schemas.android.com/tools"
         xmlns:opencv="http://schemas.android.com/apk/res-auto"
         android:layout_width="match_parent"
         android:layout_height="match_parent" >

         <org.opencv.android.JavaCameraView
             android:layout_width="fill_parent"
             android:layout_height="fill_parent"
             android:visibility="gone"
             android:id="@+id/HelloOpenCvView"
             opencv:camera_id="back" />


</RelativeLayout>
-
4th Step: Implement OpenCV code
Copy the following code into your MainActivity.java file.
-
package com.project1.sheun.opencv_tutorial; import android.Manifest; import android.content.pm.ActivityInfo; import android.content.pm.PackageManager; import android.support.v4.app.ActivityCompat; import android.support.v4.content.ContextCompat; import android.support.v7.app.AppCompatActivity; import android.os.Bundle; import android.util.Log; import android.view.SurfaceView; import android.view.WindowManager; import org.opencv.android.BaseLoaderCallback; import org.opencv.android.CameraBridgeViewBase; import org.opencv.android.LoaderCallbackInterface; import org.opencv.android.OpenCVLoader; import org.opencv.core.Mat; public class MainActivity extends AppCompatActivity implements CameraBridgeViewBase.CvCameraViewListener2 { private static final String TAG = "MyActivity" ; private CameraBridgeViewBase mOpenCvCameraView; //checks if opencv manager and the libray is installed on your devices and if not it will ask permission to install it. private BaseLoaderCallback mLoaderCallback = new BaseLoaderCallback(this) { @Override //check that you are able to use opencv public void onManagerConnected(int status) { switch (status) { //if you can initialize openCV successfully then record so in log case LoaderCallbackInterface.SUCCESS: { Log.i(TAG, "OpenCV loaded successfully"); mOpenCvCameraView.enableView(); } break; default: { super.onManagerConnected(status); } break; } } }; @Override public void onResume() { super.onResume(); // Loads and initializes OpenCV library using OpenCV Manager service OpenCVLoader.initAsync(OpenCVLoader.OPENCV_VERSION_3_4_0, this, mLoaderCallback); } @Override public void onCreate(Bundle savedInstanceState) { super.onCreate(savedInstanceState); //when using the app keep the screen active getWindow().addFlags(WindowManager.LayoutParams.FLAG_KEEP_SCREEN_ON); setContentView(R.layout.activity_main); mOpenCvCameraView = (CameraBridgeViewBase) findViewById(R.id.HelloOpenCvView); mOpenCvCameraView.setVisibility(SurfaceView.VISIBLE); mOpenCvCameraView.setCvCameraViewListener(this); } @Override public void onPause() { super.onPause(); if (mOpenCvCameraView != null) //disable camera connection and stop the delivery of frames mOpenCvCameraView.disableView(); } @Override public void onDestroy() { super.onDestroy(); if (mOpenCvCameraView != null) //disable camera connection and stop the delivery of frames mOpenCvCameraView.disableView(); } public void onCameraViewStarted(int width, int height) { //Display the image constantly regardless of phone orientation setRequestedOrientation(ActivityInfo.SCREEN_ORIENTATION_LANDSCAPE); } @Override public void onCameraViewStopped(){} @Override //take image frame from camera modify it and display it on the screen. public Mat onCameraFrame(CameraBridgeViewBase.CvCameraViewFrame inputFrame) { // take captures image frame from camera and turn it into grayscale return inputFrame.gray(); } } -
Let’s go through the some of the main sections of the code:
-
public class MainActivity extends AppCompatActivity implements CameraBridgeViewBase.CvCameraViewListener2 {First, we will create an activity that implements “CameraBridgeViewBase.CvCameraViewListener2” which acts as an interface between OpenCV and the camera.
-
//checks if opencv manager and the libray is installed on your devices and if not it will ask permission to install it.
 private BaseLoaderCallback mLoaderCallback = new BaseLoaderCallback(this) {

     @Override
     //check that you are able to use opencv
     public void onManagerConnected(int status) {
         switch (status) {
             //if you can initialize openCV successfully then record so in log
             case LoaderCallbackInterface.SUCCESS:
             {
                 Log.i(TAG, "OpenCV loaded successfully");
                 mOpenCvCameraView.enableView();
             } break;
             default:
             {
                 super.onManagerConnected(status);
             } break;
         }
     }
 };
This method checks if OpenCV manager (A separate app that will need to be installed on your phone) and the library is installed on your device and if not, it will ask for permission to install it.
-
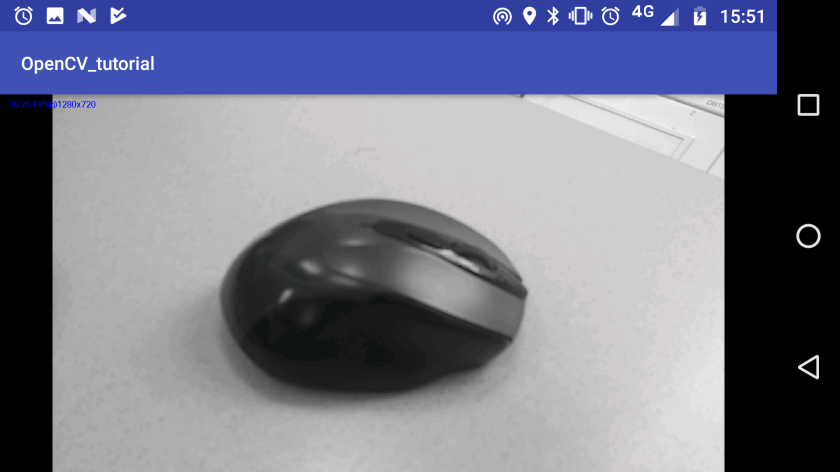
@Override
//take image frame from camera modify it and display it on the screen.
public Mat onCameraFrame(CameraBridgeViewBase.CvCameraViewFrame inputFrame) {
    // take captures image frame from camera and turn it into grayscale
    return inputFrame.gray();
}
This is the part of the code that coverts the feed from the camera into a greyscale using the “gray()” function in OpenCV and then displays it back to the screen.
-
